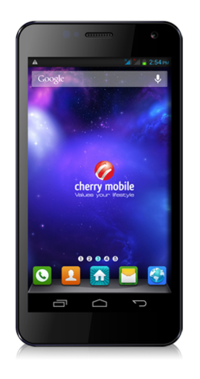
My wife got a Cherry Mobile Cosmos X phone last month. It is a mid-range phone with good specs and is powered by Android Jelly Bean 4.2.x. I’m hesitant to root it but since I have successfully rooted my other Android device, I gave it a try.

WARNING: Rooting your phone still have some risks of bricking it so only proceed if you are willing to take this risk. You’ll have no one to blame but yourself :D.
Enable developer mode
First thing you should do with this Cherry Mobile Cosmos X device is to check if developer options are enabled. Go to Settings and see if you can find the Developer options near the bottom of the settings menu. If you cannot find it, we have to enable it first. We need this option so that we can enable USB debugging later.
To enable developer mode, go to Settings -> Phone info. Tap the build number 7 times and it should say that you are now in developer mode. When you go back to Settings, you should be able to see the Developer options menu.
Next thing to do is to enable USB debugging. Go to Settings -> Developer options and tick the Enable USB debugging.
Install Android device drivers
The next thing to do is to install the Android device drives to your Windows computer. I used Windows 7 64 bit when I did the rooting. Get the drivers here and follow the installation guide.
https://www.topnotchtablets.com/installADBdriver
You should successfully install the driver before attempting to proceed.
Auto Root
Download the Auto Root package here: http://www28.zippyshare.com/v/61870221/file.html then extract the contents. Be sure your have already connected your device to your computer and above pre-requisites must have been fulfilled.
Find the file “run.bat” and execute it. A command prompt should appear telling you to press any key to proceed. Just press enter and let it do its job. After the process, it will ask again to press any key to reboot your device. Press enter and wait while the device is rebooted.
After the reboot, it should now be rooted. Look for the SuperSU app which was installed during the rooting process. Finally, disconnect the USB cable and go to Settings -> Developer options and disable USB debugging.
What now?
Now that this Cherry Mobile Cosmos X is rooted, we can try installing some root apps. When I root our device, I immediately install “ReScan Media” app. This app can disable the Media Scanning that drains your battery fast. Install this app from Google Play. Once installed, find the app “ReScan Media Root” for the rooted version of the app and run it. Tap the option to disable media scanning. It will ask SuperSU to grant permission. Grant it root permission then.
That’s it. Enjoy and share.
Original source: TechBloggerZone
Hi!
The instructions you provided were so precise.
I am very thankful that I have successfully rooted my Cherry Cosmos X , and believe me I also hesitated the first time I read this.
One thing that you have missed from the list of instructions is to click the ” Scan Hardware changes” I had to go to the device manager and click that icon. I had to do that because it did not recognize my phone ( plugged in using USB ) when I run the PDAnet app.
Issue resolved with error “Storage running out of space”
I was also able to use link2sd app! and it was great! superb!
Thank you so much!
Damsel Dee
I’m glad it helps you.
I had issues running this… I followed it by the letter and ended up with SuperSU issuing an error stating that it’s ‘missing its binaries’…
Went ahead with the Framaroot method instead. Thanks anyway.