Yesterday, I have posted about Pagodabox, a scalable PHP platform. Today, and for the days to come, I will be posting more about the technicalities in Pagodabox hosting platform. This time, we will install a Kohana based application in Pagodabox.
Setting up an account
First, you must signup for an account in Pagodabox. Visit http://www.pagodabox.com/ and get an account. You will not be charged for anything. Once you have an account, login to the Pagodabox dashboard.
Create an application

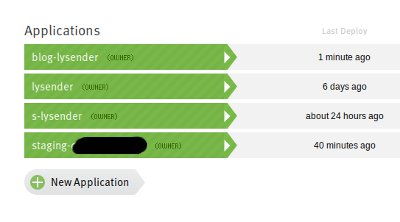
The next step is to create an application. On the Pagodabox dashboard, click on the button for creating an application. Enter the name of your application. It would be nice to use alpha-numeric (or with dashes) name so it would be easy to type and remember later. Also, it must be GIT friendly. Once you create the application, Pagodabox will instruct you to hook up your GIT repository to theirs.
Your GIT repository
It is required that you use GIT as code repository as this is required by Pagodabox. If you are not familiar with GIT, please visit http://git-scm.com/ and have a quick study on it. GIT is not actually too hard to learn. You don’t have to learn the GIT kung-fu to do basic tasks.
Also, you need to use the command line to easily follow the guides provided by Pagodabox. If you are in Linux or Mac, that should not be a problem. If you are in Windows, you may install additional software to make GIT work on your command line.
If your local application (your application in your machine) is not yet set up for a GIT repository, you may do this:
cd /path/to/your/project
git init
git add .
git commit -m "Initial import"
Before you can push your code to Pagodabox, you must register your SSH keys. For creating and registering your ssh keys, follow the tutorial by Pagodabox here. In my case, I already have my SSH keys and copied them on all machines that I’m working on so what I did is just get it from ~/.ssh/id_rsa.pub and paste them on my Pagodabox account setting.
The series of commands above simply create a GIT repository within your project and imports your project into the repository. The next step is to setup your repository so that it can upload your code to Pagodabox servers. When you create your application, you are given the GIT remote url. For example your remote URL is git@git.pagodabox.com:your-app-name.git, you do it like this:
git remote add pagoda git@git.pagodabox.com:your-app-name.git
git push pagoda --all
The command above will upload and deploy your application to Pagodabox servers. It may take some time. When complete, you can view your application in the URL that looks like this:
http://your-app-name.pagodabox.com/
My application is not working!
By default, Kohana application will not work in Pagodabox without doing more configuration. The most comment issue is that the cache and logs directories are not writable. This is due to the fact that your application code must be read-only.
Now that it is not working, lets fix it!
Shared writable directories
Your Pagodabox application is different from the classic hosting server setup. Your code may be hosted in more than 1 server, that’s why writing to file (logging/caching) is not guaranteed to work. With this, Pagodabox offers a 10MB of shared writable directories for the basic package. This directories will be mounted as a network mount to all servers where your application may be hosted.
You must enable your shared writable directories in your application’s admin panel. In the dashboard, click on Admin tab. There you can enable the shared writable directories and set an SSH password for it. This means that you can login to this directories via SSH and manage your files such as logs. You can also use SFTP to access your shared files.
Now we know which directories needs to be writable, the application/logs and the application/cache directories. We need additional files to create aside from our project codes.
.gitignore
We must create a .gitignore to ignore files inside the logs and cache directories. Simply create a file under your project root directory and name it .gitignore. The content looks like this:
/application/logs
/application/cache
Save the file and create the next file.
Boxfile
Boxfile is a Pagodabox specific file which is using the YAML format. This is your application’s main configuration file. In most cases, you can leave it blank since the defaults are pretty good enough. But in our case, we are about to indicate our shared writable directories.
Create a file named Boxfile under your project root with this content:
web1:
  shared_writable_dirs:
    - /application/logs
    - /application/cache
  php_extensions:
    - pdo_mysql
Let’s try again
Now that we have specified our shared writable directories, we are now ready to commit our changes. Let’s commit our changes to our local repository and push changes to Pagodabox.
git add .
git commit -m "Added gitignore and boxfile"
git push pagoda --all
Visit your application again and it should now be working.
What about my database?
Database is an add-on service for in Pagodabox. The basic package allows 10MB of database storage and 10MB of memory for your database. This should be enough for development and you may choose to increase them in production for a price.

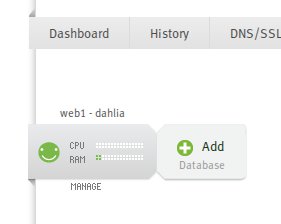
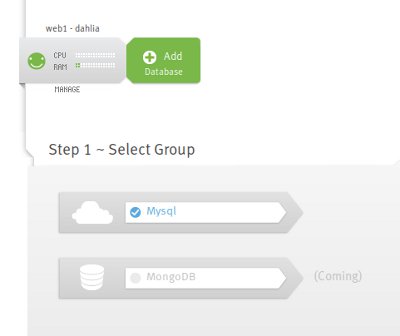
In your application dashboard, click on the database add-on. From there, you can set the database name then you will be given the credentials such as hostname, user and password. Set this credentials to Kohana’s database config.

Please note that there is currently no PDO support in Pagodabox, therefore we need to stick first to MySQL driver.
UPDATE: Thanks for the comments below, I have updated my post – my bad. Pagodabox enabled PHP extensions are very few but you can add what you need in the Boxfile. In our case, (or my case), I need the PDO MySQL driver. See the Boxfile above.
How to upload my database?
Pagodabox has a ruby gem for its command line client. This can be used to tunnel connections to your Pagodabox databases. However, the Pagodabox’s ruby gem does not work for my machine, therefore I resorted to using phpMyAdmin. This could improve later but I have no other choice but to use this approach.
Add phpMyAdmin to your project maybe by just copying and pasting it inside your project directory. Create te file config.inc.php using the phpMyAdmin sample provided and inside the file, specify your MySQL host.
Now let’s upload phpMyAdmin.
git add .
git commit -m "Added phpMyAdmin"
git push pagoda --all
If your phpMyAdmin directory is phpmyadmin, then you may visit it via: http://your-app-name.pagodabox.com/phpmyadmin. Now that you have access to your database, upload your local database by dumping it and import it on Pagodabox.
When your application is working and you realize that phpMyAdmin should not be there, we can delete them. Simpy run this commands.
rm -rf phpmyadmin
git add .
git add . -u
git commit -m "Removed phpmyadmin"
git push pagoda --all
That’s it, phpMyAdmin is gone.
Pagoda Box supports the PDO extension. You just need to enable it in your Boxfile.
Edited by admin to show the hidden link:
PHP Extensions in the Boxfile
Nice article. Just a quick note, there is PDO support. You just have to enable it in your Boxfile. See http://help.pagodabox.com/customer/portal/articles/175475-understanding-the-boxfile . The extension name to enable is pdo_mysql. Great article though, I’ll have to be checking out kohana soon. 😀
Wow, I never reached that far with the Boxfile. Thanks for pointing that out Scott and Joseph. Got to update my app then.
Thanks
Thank you for sharing. Question, does Pagodabox provide cron jobs and email hosting?
Not yet for now but according to them, background worker feature is coming. I haven’t seen any topic regarding email hosting and didn’t see them in the feature list.
In the admin panel, there is an option to specify the outgoing email server, therefore we can conclude that they don’t have email hosting support for now.
can you please send me the config.inc.php.
i’m pretty new at this and i don’tknow what is the right way to setup the hosts.
regards,
Cronjobs and workers are now in Pagoda box