I’ve been a Globe Tattoo user almost two years and so far it is almost good. However, due to our location, Globe’s 3G signal is too poor and decided to switch to SmartBro since its 3G signal is quite strong in our place. For just 995 pesos, I got a starter modem and now I’m using it on Slackware Linux.
Configuring Modem
The usb 3G modem is ZTE MF180. I’m glad that I’m always update with Slackware Linux that the SmartBro’s ZTE MF180 modem is detected as modem immediately. I may have configured it before during my Globe Tattoo’s days but one thing for sure: I have usb_modswitch installed already but I don’t remember I ever used it.
Anyway, to check if your SmartBro’s modem is detected as modem, check /dev/ttyUSB* if it contains modem devices.
ls /dev/ttyUSB*
It should list devices like ttyUSB0, ttyUSB1 and so on.
wvdial and kppp
When I installed Globe Tattoo before, I used wvdial initially and later on switched to kppp since it is easy to use and my wife knows how to use it also. What I did was to use wvdial first to configure it properly and latter on used kppp after everything is set.
In Slackware, the first thing we need to do is run pppsetup. Just go ahead and follow the wizard. The most important thing to note is that we are only setting up pppd properly and override it later on. You may be ask to enter the phone number to dial, init string, etc, just fill it using the examples.
wvdial
Now that pppd is set up, we need to install and configure wvdial. If you don’t have it yet, install it first. You will need wvstreams as a pre-requisite.
wvstreams: wvstreams-4.6.1.tar.gz
wvdial: wvdial-1.6.1.tar.gz
Install them both using the usual configure-make-install kung-fu.
Configure wvdial
Now we are ready to configure our wvdial and the modem. Put the following configuration in your /etc/wvdial.conf.
[Dialer Defaults]
Init1 = ATZ
Init2 = ATQ0 V1 E1 S0=0 &C1 &D2 +FCLASS=0
Init3 = AT+CGDCONT=1,"IP","smartbro"
Password = pass
Phone = *99#
Modem Type = Analog Modem
Stupid Mode = 1
Baud = 9600
Dial Command = ATDT
Modem = /dev/ttyUSB0
ISDN = 0
Username = user
We just put a sample configuration but we need to override them with the correct modem. Run the following command.
wvdialconf
It will detect the modem and configure /etc/wvdial.conf. My modem is actually at /dev/ttyUSB3 so yours may be different. If it complains that it conflicts with /etc/ppp/options, edit /etc/ppp/options like what I did where I commented out the conflicting lines.
# General configuration options for PPPD:
lock
defaultroute
noipdefault
modem
#/dev/ttyUSB0 - commented out
#460800 - commented out
crtscts
# Uncomment the line below for more verbose error reporting:
#debug
# If you have a default route already, pppd may require the other side
# to authenticate itself, which most ISPs will not do.  To work around this,
# uncomment the line below.  Note that this may have negative side effects
# on system security if you allow PPP dialins.  See the docs in /usr/doc/ppp*
# for more information.
#noauth
passive
asyncmap 0
name "user"
Next, run wvdial and let it connect. It should connect and display a local and remotely assigned IP address or some DNS info dumped on the terminal. Once it successfully connects, copy the nameservers from /etc/ppp/resolv.conf into /etc/resolv.conf so that DNS stuff will be properly configured and you will be able to connect to the internet. Disconnect wvdial by pressing CTRL+C.
Below is my /etc/ppp/resolv.conf:
nameserver 121.1.3.168
nameserver 121.1.3.250
Copy the name servers to /etc/resolv.conf:
search smart.com.ph
nameserver 121.1.3.168
nameserver 121.1.3.250
nameserver 207.132.116.5
nameserver 8.8.8.8
Other entries are OpenDNS and Google DNS which you may optionally include also if you wanted to.
The next time you run wvdial, you should be able to connect to the wild internet. If not, you may try restarting the machine or reload the network configuration, but it is still easier to restart instead.
kppp
After going with the hard way, we can optionally go with the easier way, and does not even require root permission. This is by using kppp from KDE.
First, launch kppp from the menu from whatever desktop manager you got in there.
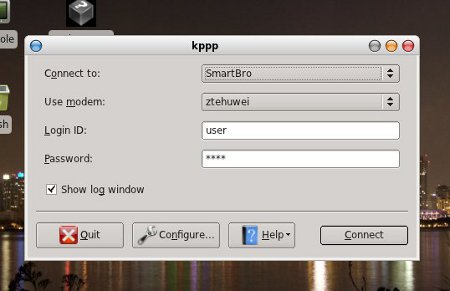
Then click configure to configure the account and modem.
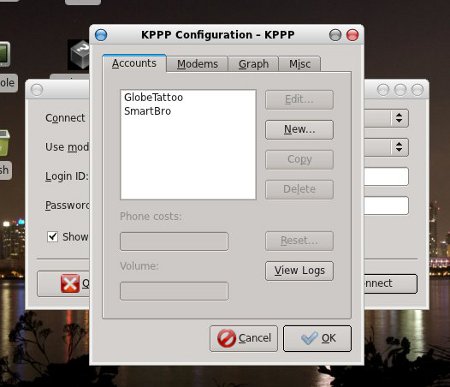
On the accounts tab, click new to create a new account. This is account will be your SmartBro dialer account.
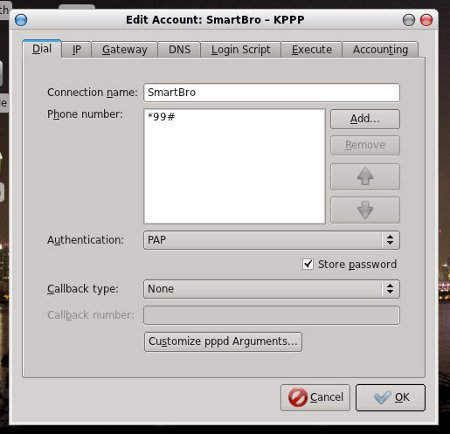
Enter the name of the dialer, ex: SmartBro, then add a phone number *99#. Select PAP as the authentication type then save the account.
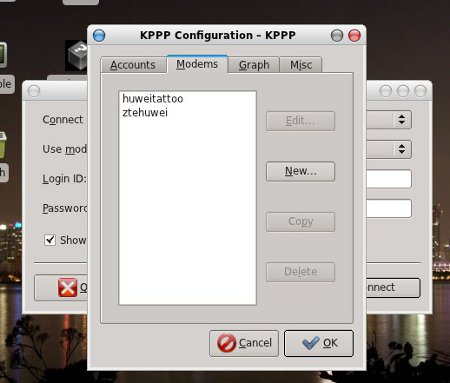
Once done saving the account, click on the modem tab to configure your modem. Click the new button to add a new modem.
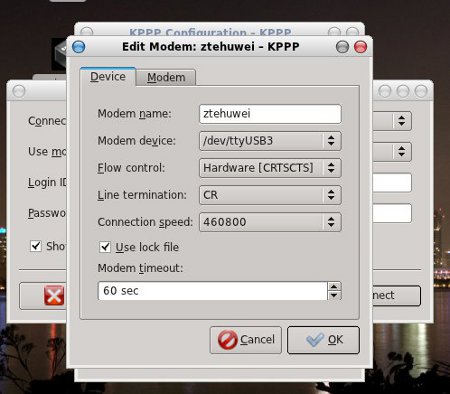
On the device tab, enter the modem name, any name you want to name it then choose the device from the list based on the outcome when you configure wvdial. My modem is at /dev/ttyUSB3 but yours may be different so adjust accordingly.
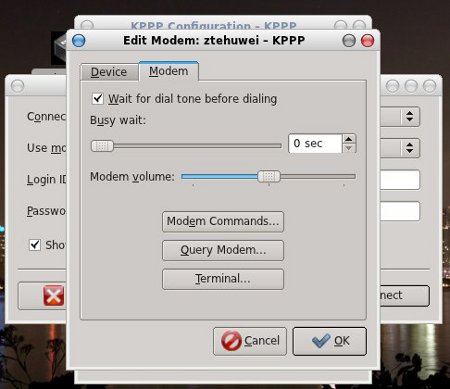
Click on the modem tab to configure the device such as init strings and dial command. Click on the modem commands.
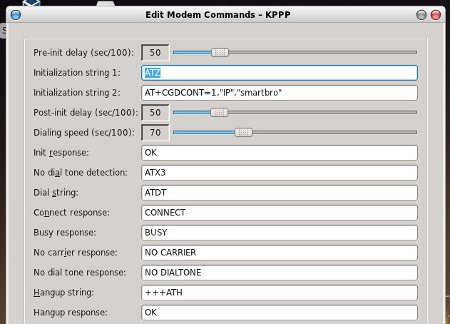
On the modem commands window, enter this for init string 2 just like as seen on the image above.
AT+CGDCONT=1,"IP","smartbro"
Let other values as is.
Once everything is set, we are now ready to connect using kppp. You may close all the other windows and go back to the kppp initial screen. From there, click the connect button.
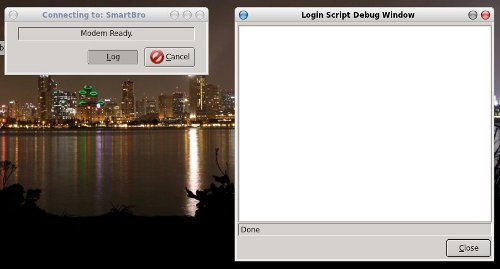
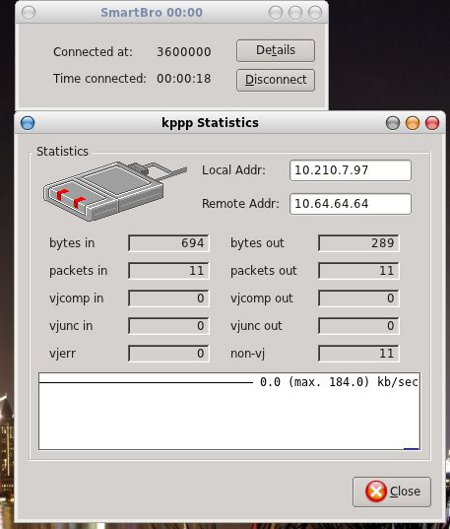
When you select “show log window”, you may see something like the one above. It should connect after few seconds and kppp will minimize its window itself. However you can show it again and see the traffic details. You can also configure it so that it will appear on the system tray.
Enjoy SmartBro’ken!